The step-by-step method
How to make a death binder: a calm, step-by-step guide (2026)
Exactly how to make a death binder, step by step — what to gather, how to organize it, what to leave out, and how to finish in one evening instead of dreading it for years.
11 min read··By the InCaseBinder team
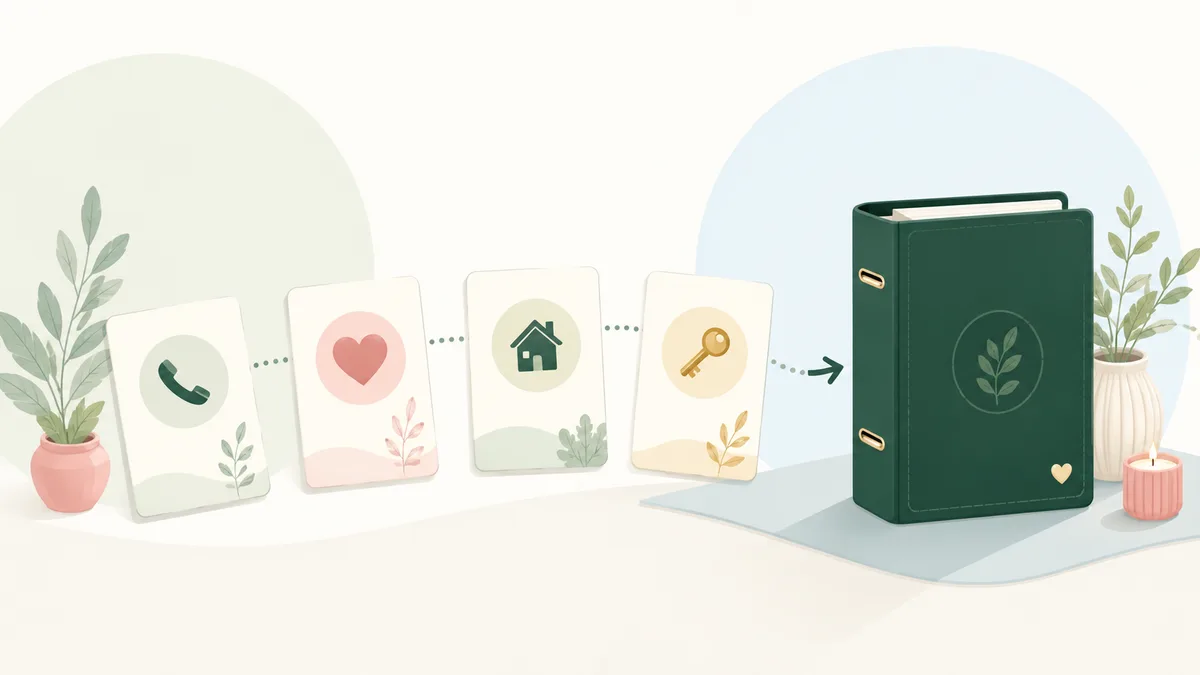
To make a death binder, you gather your family's essential information into one organized place, sort it into about ten sections, write pointers instead of passwords, and store it where a trusted person can find it. That's the whole method in a sentence. The reason most people never do it isn't the work — it's the dread, and the blank 200-page template that makes an evening's task feel like a month's.
This is the calm version: a seven-step process for building a death binder your family can actually use, what to put in each part, what to deliberately leave out, and how to finish in one sitting. If you want the deeper definition first — what a death binder is and how it differs from a will — start with our guide to what a death binder is. Otherwise, roll up your sleeves; we'll go step by step.
Before you start: what you actually need
Less than you think. You do not need every document in your hand, every account number memorized, or a free weekend. To make a death binder you need three things:
- One uninterrupted evening — 60 to 90 minutes is enough for a first complete pass.
- A format to build in — a printable template, a fillable PDF, or a guided online generator (more on choosing below).
- Permission to be imperfect — a binder that's 80% done and findable beats a flawless one that lives in your head.
Pour something warm, put your phone on do-not-disturb, and treat it as one task with an end — not an open-ended life-admin project. Momentum is the whole game.
How to make a death binder, step by step
Step 1 — Choose a format you'll actually finish
The format decides whether this gets done. Your three honest options:
- Free printable template. Great price, fine for the basics. The catch: every section is shown to every family, so you stall on the pages that don't apply to you. Best as a starting point — grab a free one-page ICE sheet to begin today.
- Fillable PDF (Etsy-style). Comprehensive — often 100 to 300 pages. Thorough if you have the discipline to push through; the most common reason people quit is the sheer page count.
- Guided online generator. Instead of blank pages, it interviews you and hides the sections that don't apply, then produces a finished, downloadable PDF. This is the fastest route to a complete binder. See our full comparison of binder templates and the paper-vs-digital-vault breakdown if you're weighing options.
Whatever you choose, the rule is the same: skip aggressively. No pets means no pet pages. Renting means no deed paperwork. Blank sections aren't thorough — they're clutter that makes the binder harder to use on the worst day.
Step 2 — Start with the one page that matters most
Before anything else, build the “who to call first” page— sometimes called the ICE (In Case of Emergency) sheet. It's the only page that matters in the first hour, and finishing it in five minutes gives you the momentum to keep going. Put on it:
- Two to four steady people: name, relationship, phone number.
- Your attorney, insurance agent and accountant, if you have them.
- Neighbors or friends who hold a key or know your kids and pets.
- Your home address — for a panicked babysitter who has to tell 911 where they are.
Keep it to a single page and put it at the very front. Later, copy it to the fridge, the glovebox and your wallet.
Step 3 — Map where everything lives (the pointer method)
Here is the single most useful idea in this whole guide: a death binder records where things are, not the secrets themselves. You are writing a map, not a vault.
Go room by room in your mind and note the location of every important thing: the will, the insurance policies, the deed or lease, passports and birth certificates, the safe and how it opens, tax returns. Write “life insurance policy — blue folder in the office closet,” not the policy number. This keeps the binder transformative for your family and useless to anyone who shouldn't have it. For the full do/don't list, see what not to put in an emergency binder.
Step 4 — Capture the money and benefits nobody thinks to claim
This is the section that quietly justifies the whole project. Billions of dollars in life insurance go unclaimed every year, largely because beneficiaries never knew the policies existed. Write down, in pointer form:
- Work benefits: employer, HR contact, and especially group life insurance, 401(k), pension or stock — the money your family doesn't know to ask about.
- Where you bank and invest: institutions and what's there, not account numbers.
- What you owe: mortgage, loans, credit cards, and roughly the balances.
- Bills on autopay: which ones, from which account — so nothing gets shut off and nothing keeps charging a card forever.
Step 5 — Handle digital life and passwords safely
Your digital life is where modern estates get stuck: the photos, the email everything recovers through, the accounts on autopay. The safe way to include it:
- Note which password manager you use and how your family gets emergency access (for example, a printed 1Password emergency kit in the safe) — never a list of passwords.
- Record a phone and computer access plan: where the passcode is stored, who is set as your legacy or recovery contact.
- List the accounts that matter — the recovery email, photo storage, and any subscriptions to cancel or keep.
Step 6 — Write the part only you can write
Everything so far is logistics. This step is the one your family will actually keep: your wishes, in your own words. Funeral or memorial preferences — burial or cremation, the song, the tone, any arrangements you've already made — and then a short letter to the people you love. It doesn't have to be eloquent. “Here's what I'd want, and here's what you meant to me” is enough. Families consistently say this is the page they read first and keep forever.
Step 7 — Store it, tell two people, and set a yearly reminder
A binder nobody can find protects nobody. Finish the job:
- Store it somewhere a trusted person can reach in minutes but a stranger can't — a fireproof document safe, a labeled office shelf (if it's pointer-based), or with your estate documents.
- Tell at least two people it exists and where it is. An unfindable binder is just a diary.
- Calendar ten minutes every January to review it. An outdated binder breeds confusion at the worst possible moment; a quick annual pass keeps it trustworthy.
How long does it take to make a death binder?
It depends entirely on the format. A blank, comprehensive template realistically takes 8 to 12 hours, almost always spread across several weeks — and that gap-between-sessions is exactly where most binders die half-finished. A guided generator that asks questions and hides irrelevant sections gets the median family to a complete first draft in about 90 minutes — one evening, start to finish. You can always add detail on the yearly review; the goal of the first pass is done, not perfect.
Making a death binder online vs. on paper
“On paper” and “online” aren't opposites here — the smartest approach is to build it online and end up with paper. A web-based generator lets you answer questions, preview every page, and download a fillable, print-ready PDFyou keep forever. That's different from a cloud “digital vault,” which stores your most sensitive information on a company's servers for a yearly subscription. If you're torn between the two models, our binder vs. digital vault comparison weighs security and ten-year cost side by side. Our own approach is privacy-first: the binder is generated in your browser, so nothing is uploaded.
The four mistakes that ruin a death binder
- Writing actual passwords or full account numbers. A binder on a shelf is only as secure as your home. Use pointers.
- Chasing perfection. The half-finished 200-page template protects no one. A short, complete binder wins.
- Telling nobody. If the people who need it can't find it, it may as well not exist.
- Never updating it. A move, a new child, a new job or a divorce can make an old binder misleading. Ten minutes a year fixes it.
What to do next
If you have an evening, you can have a finished death binder by the end of it. Build yours with our free guided questionnaire— it walks you through every step above, hides what doesn't apply, and generates a printable binder your family will actually be able to use. For the exhaustive item-by-item list, keep our complete emergency binder checklist open in another tab. And if you're here because you've just lost someone, our guide on what to do when someone dies covers the first 48 hours, gently and step by step.
Frequently asked questions
How do I make a death binder?
Make a death binder in five moves: pick a format (a printable template, a fillable PDF, or a guided online generator), start with a one-page list of who to call first, then work through the core sections — household, medical, work benefits, insurance, money, home, digital life, document locations and your wishes. Use pointers instead of passwords, then store it somewhere a trusted person can find it and tell at least two people where it is.
What should be in a death binder checklist?
A complete death binder checklist has ten parts: emergency contacts, household basics, medical information, work and benefits (including group life insurance), insurance policies, money and debts, home and property, digital life and account access, where your important documents physically live, and your funeral wishes plus a letter to your family.
How long does it take to make a death binder?
With a blank fill-in-the-blank template, most people spend 8–12 hours spread over weeks — which is why so many are never finished. With a guided tool that asks questions and skips the sections that don't apply to you, the typical family finishes in about 90 minutes, in a single evening.
Can I make a death binder for free?
Yes. You can start with a free printable template or a free one-page ICE sheet today. Guided online generators like InCaseBinder are also free to build and preview — you only pay a one-time fee if you choose to download the finished PDF, and nothing is uploaded because the binder is generated in your browser.
How do I make a death binder online?
To make a death binder online, use a web-based generator instead of printing a blank template: you answer plain-English questions in your browser, preview every page, and download a finished, print-ready PDF. InCaseBinder does this without installing software and without sending your answers to a server.
What's the difference between a death binder and a legacy binder?
They're the same thing under different names. 'Death binder,' 'legacy binder,' 'in-case-of-death binder,' 'end-of-life binder' and 'death preparation binder' all describe one organized place that tells your family where everything is and what you wanted. Pick whichever name feels least heavy — the contents are identical.